Tyler Ferrell is the only person in the world named to Golf Digest's list of Best Young Teachers in
America AND its list of Best Golf Fitness Professionals in America.
Meet your new instructor.
Train Your Release
Subscribe now to watch the full video.
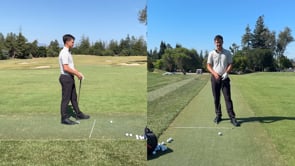
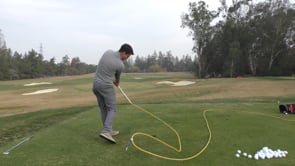
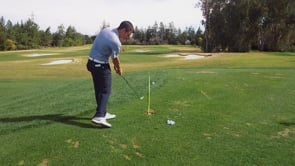
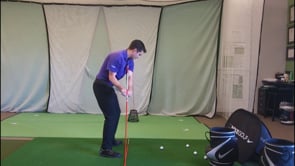
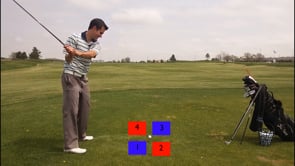
Use alignment sticks at home (or tape on the floor), or tees at the course, to create a visual grid with the golf ball at the center of the intersection. This will help you be able to SEE the path of the club through impact. I like to number the boxes for easy communication with students. If you use the 1,2,3,4 designations that I outline in this video then understanding club path will be easy. Staying in the odd boxes will help you have an inside out and shallow path, and staying in the even numbers will heal you have an outside in and steep path. Use this drill to fine tune your body's movements and how it affects your path.
Your feels are lying to you
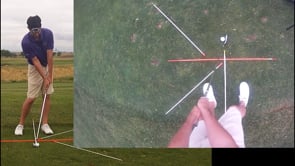
The ball flight never lies to you. Sometimes it is confusing, but it never lies to you. If you "feel" like you swing the club way to the right, but the golf ball starts straigh and curves to the right (for a right handed golfer) then you know that you swung the club from outside to in (even boxes). It doesn't matter what you think you did, what you did is what produced the ball flight. Once you have a solid understanding of reading the ball flight, then you have a good chance to be able to make changes that will make it fly the way that you want to. Use this grid system on the range (or course by yourself) to help with your alignment, but more importantly to help give you a consistent path reference frame to speed up your learning.
Tags: Not Straight Enough, Draw vs Fade, Release, Drill, Beginner
00:00:00,000 --> 00:00:05,000
This drill video is called 4Square and it's the help you work on your swing path.
00:00:05,000 --> 00:00:11,000
So as you can see I've got two alignments, they're just one orange and one white, laid down on the ground.
00:00:11,000 --> 00:00:16,000
And just like the old 4Square game, this creates a nice little grid.
00:00:16,000 --> 00:00:20,000
We're going to, we're going to number these just for common language.
00:00:20,000 --> 00:00:27,000
So this one that my right foot is in is going to be square one and we have square two, square three and square four.
00:00:27,000 --> 00:00:43,000
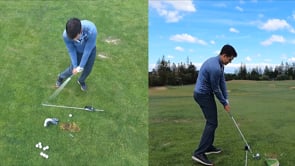
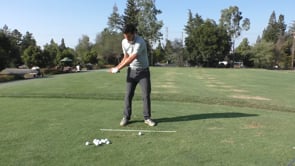
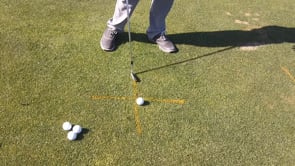
Okay, so if we imagine that I'm hitting straight down the orange line or my target is straight down the orange stick, then the club going from square one to three or staying in the odd numbers is going to tend to hit a draw.
00:00:43,000 --> 00:00:48,000
Or at least have a path that's inside out, have the potential to hit a draw.
00:00:48,000 --> 00:00:58,000
Or a club that is going more from squares two to four or evens is going to tend to hit more of a pole or a pole fade.
00:00:58,000 --> 00:01:06,000
So this is a fun little visual where you can practice making different body movements to alter the path.
00:01:06,000 --> 00:01:12,000
So this is a great little visual for understanding the path, but the problem is these sticks take up.
00:01:12,000 --> 00:01:15,000
So it's not very practical as far as hitting on a real shot.
00:01:15,000 --> 00:01:22,000
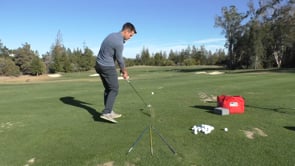
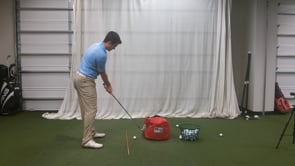
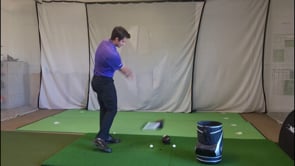
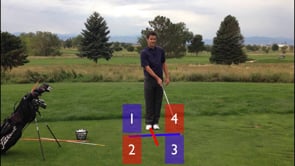
So what I recommend is to take some teas and create a little grid instead.
00:01:22,000 --> 00:01:45,000
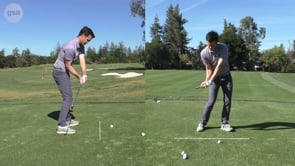
So here I've created the user or the usable force square model.
00:01:45,000 --> 00:01:52,000
So I've got a couple teas, two brown and two white and they create the grid that we were just talking about.
00:01:52,000 --> 00:01:55,000
So we've got square one, two, three, four.
00:01:55,000 --> 00:02:01,000
Right, as long as the club is moving from square one to three, the path is going to be mostly in out.
00:02:01,000 --> 00:02:06,000
As long as I am moving from squares two to four, the path will be outside to in.
00:02:06,000 --> 00:02:10,000
So this is a great way to play around with understanding some of your ballplay.
00:02:10,000 --> 00:02:28,000
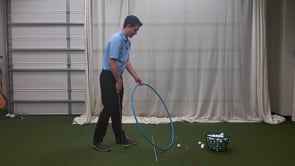
As a drill, what I like to have people try to do is to try to get the club pointed more or less at the target and to do whatever they can with their body to get the club almost come coming from this tea here to that tea there because that be as much into out as I can.
00:02:28,000 --> 00:02:35,000
Then I'll have them do the opposite going from this tea here towards this tea.
00:02:35,000 --> 00:02:39,000
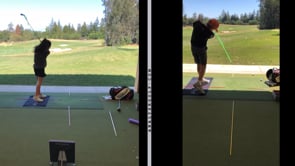
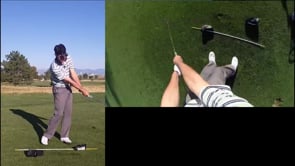
And I'll demonstrate from the down the line so you can kind of visualize that.
00:02:39,000 --> 00:02:45,000
So in the first version, I'm going to go from this white tea in close to me to that white tea out there.
00:02:45,000 --> 00:02:52,000
So that's an exaggeration of an into out path and then I'm going to exaggerate the out to in.
00:02:52,000 --> 00:02:59,000
And it gives me a good little visual because sometimes what'll happen is I will feel like I am really swinging into out.
00:02:59,000 --> 00:03:04,000
But the blur of the club will go from square two to square four.
00:03:04,000 --> 00:03:10,000
So this gives you a good little visual for seeing what the club is doing differently than just putting a club on the ground.
00:03:10,000 --> 00:03:14,000
And I think it can be helpful for working on your ball shaping.